
🍂 Colorful Fall Leaf Press Project 🍂
Leaves come in many shapes and sizes. You will find the biggest (undivided) leaf on the giant edible arum. This is the perfect time of year to head outside with your kiddos and talk about the different types of trees where you live.
For this project any of the Do A Dot Art! Markers will work perfectly. For our project, we used our Rainbow and Brilliant markers to reflect the different colors of fall leaves! And using different box sets gives you a great opportunity to find just the right shades for the trees where you live.
Take this chance to learn more about trees and the different types of trees that grow in your area. And, unlike some trees that can cause allergies, Do A Dot Art! products are soy, gluten, wheat, tree nut, casein, peanut, egg, and dairy free, and do not contain latex.
🍁 Step ONE: Gather your materials!
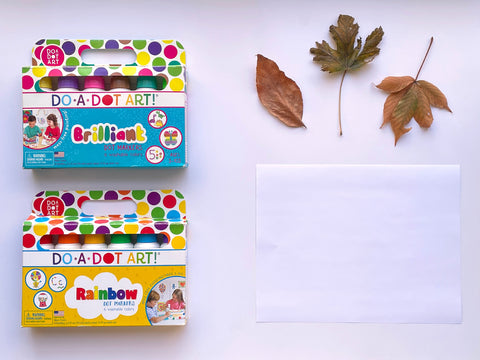
You will need:
- Plain white cardstock paper
- Leaves collected from your yard or a local park
- Your Favorite Do A Dot Art! marker colors! (We picked the Rainbow, and Brilliant markers for our project)
* Pro tip - make sure that your leaves are not too dry or crunchy, so you will be able to easily press down on all areas of the leaf.
🍁 Step TWO: Place the leaves on the page to determine what design you want.

🍁 Step THREE: Decorate the back side of your leaves with your favorite color combinations.

🍁 Step Four: Place your leaves with ink side down on the cardstock paper, and press all areas of the left down on the page.

🍁 Step FIVE: Pick the leaf up by the edge and peel off of the page. Set the page in a place it will not be disturbed and allow it to dry completely.
* Pro tip - Outline your pressed leaves (once dry) for more definition.

🍁 Step SIX: Find the perfect spot in any room to decorate with these cute and colorful left-press pages. They make a great fall decoration piece as well as a Thanksgiving decoration.